Y’all, hold on tight with this one… there’s so much to catch up on what’s happened over here! Over the last 5 months, my dad and I have been hard at work demolishing and building. It’s been a wild journey to see how far we’ve come and I’m so happy that we’ve been able to do it at all. My dad has had some experience with home renovation on just remodeling little things here and there in his house. There were a few things he’s never done before so I’m just very proud of him for the time he’s put in to help me and teach me along the way. Because I’ve seen the house in its bare bones and knew how much work was put in to putting it back together, I can truly appreciate it that much more.
So enough background on that, let’s get into where we’ve been and what we’ve done!
Windows

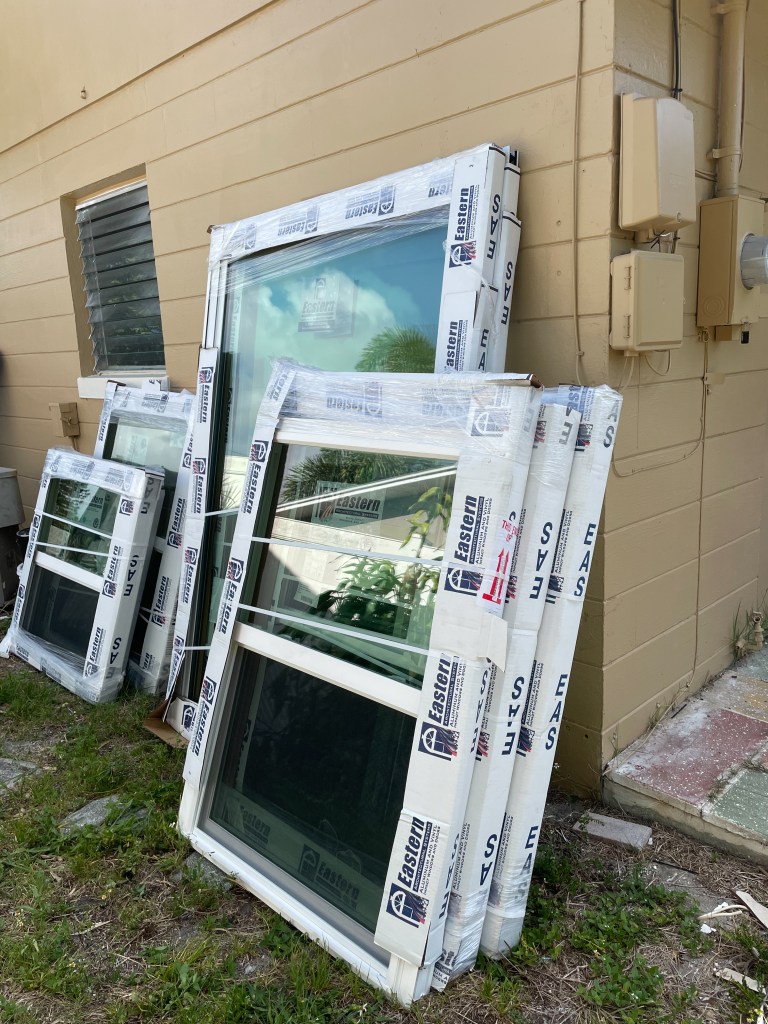
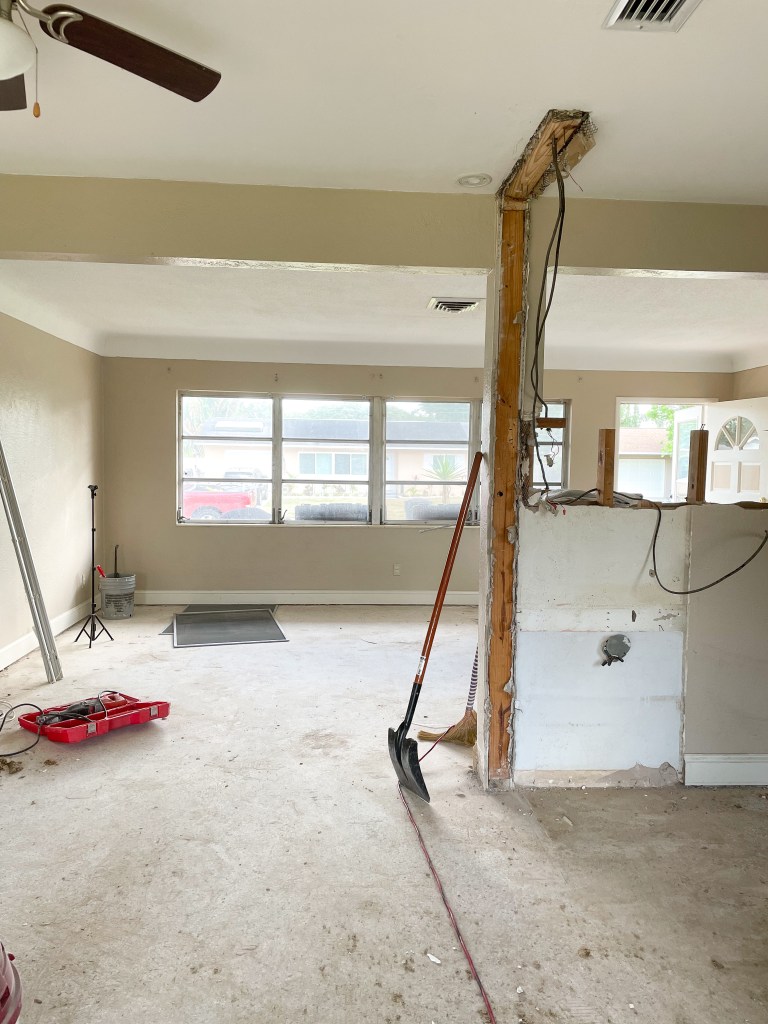
The first thing we NEEDED to do was replace the windows and sliding glass doors. They were the original aluminum, one pane windows from the past. I mean… parts were missing, didn’t close properly and had so many gaps that let out all the AC. So from a safety and energy efficiency standpoint, we had to get the windows upgraded. I went with hurricane grade windows that would save both money on the electricity bills and storage because now I won’t need to take up space to store the shutters. Florida things, am I right?
Kitchen and Walls
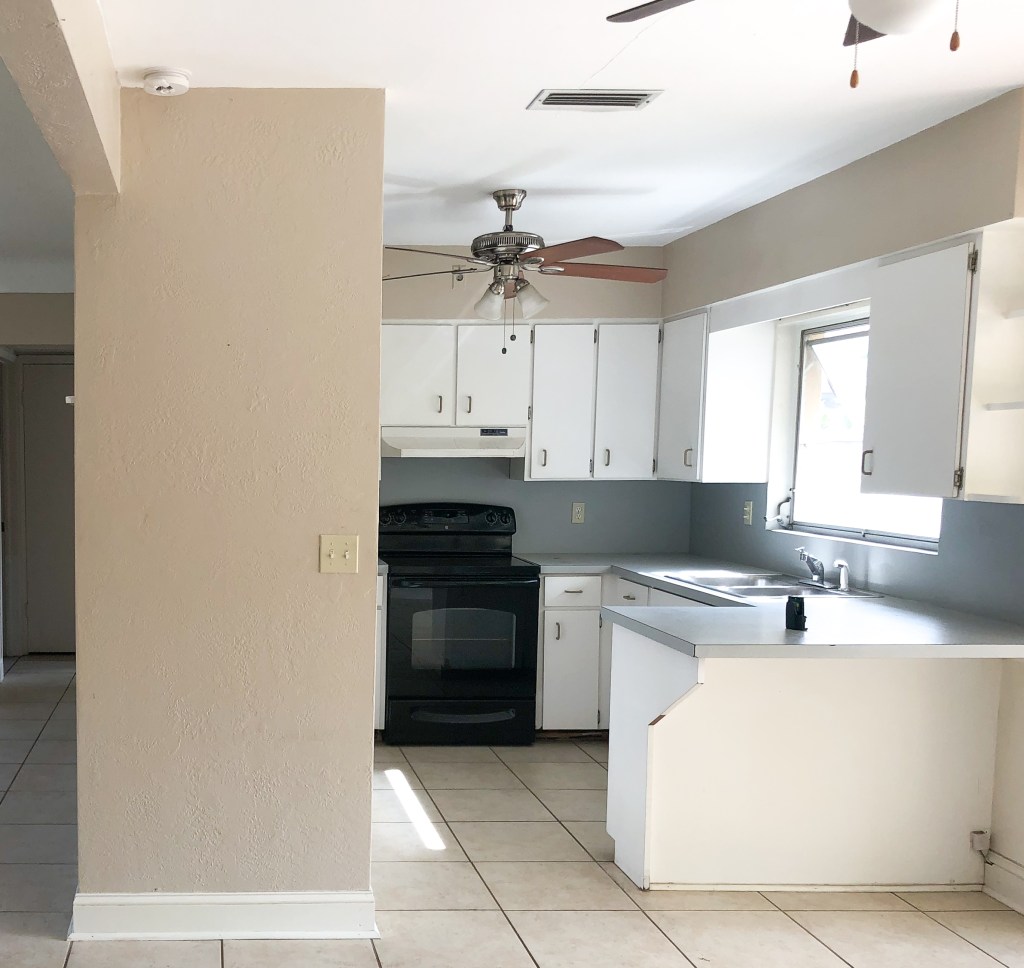
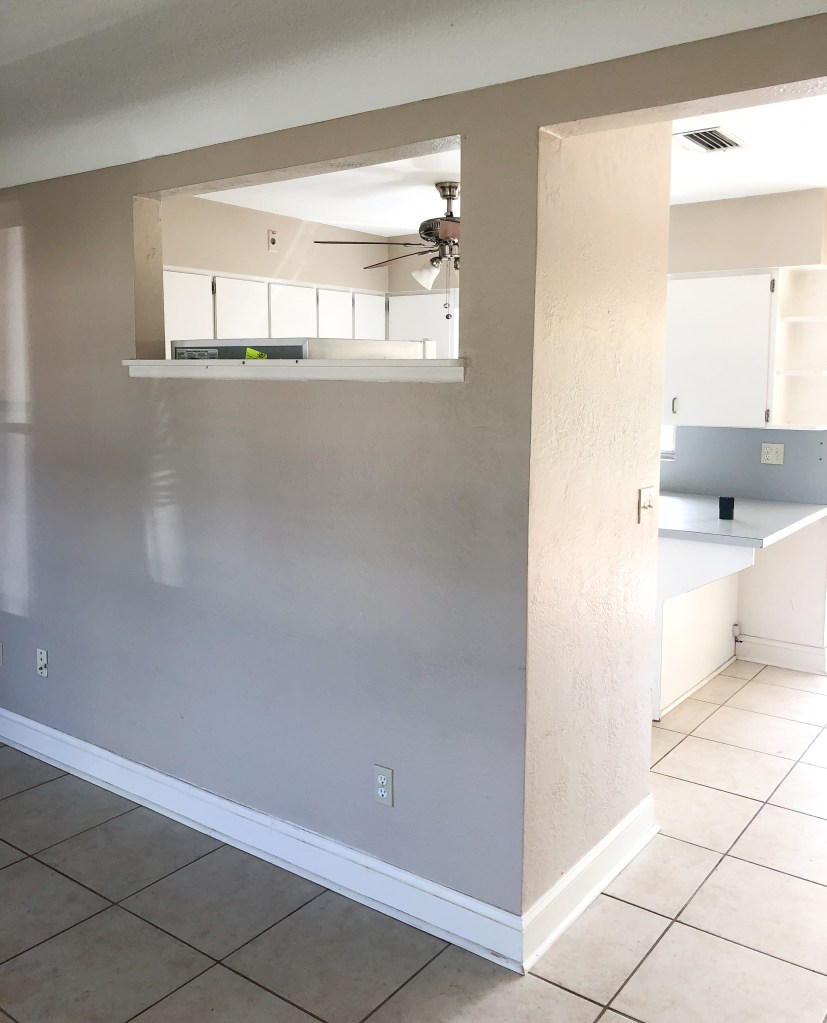
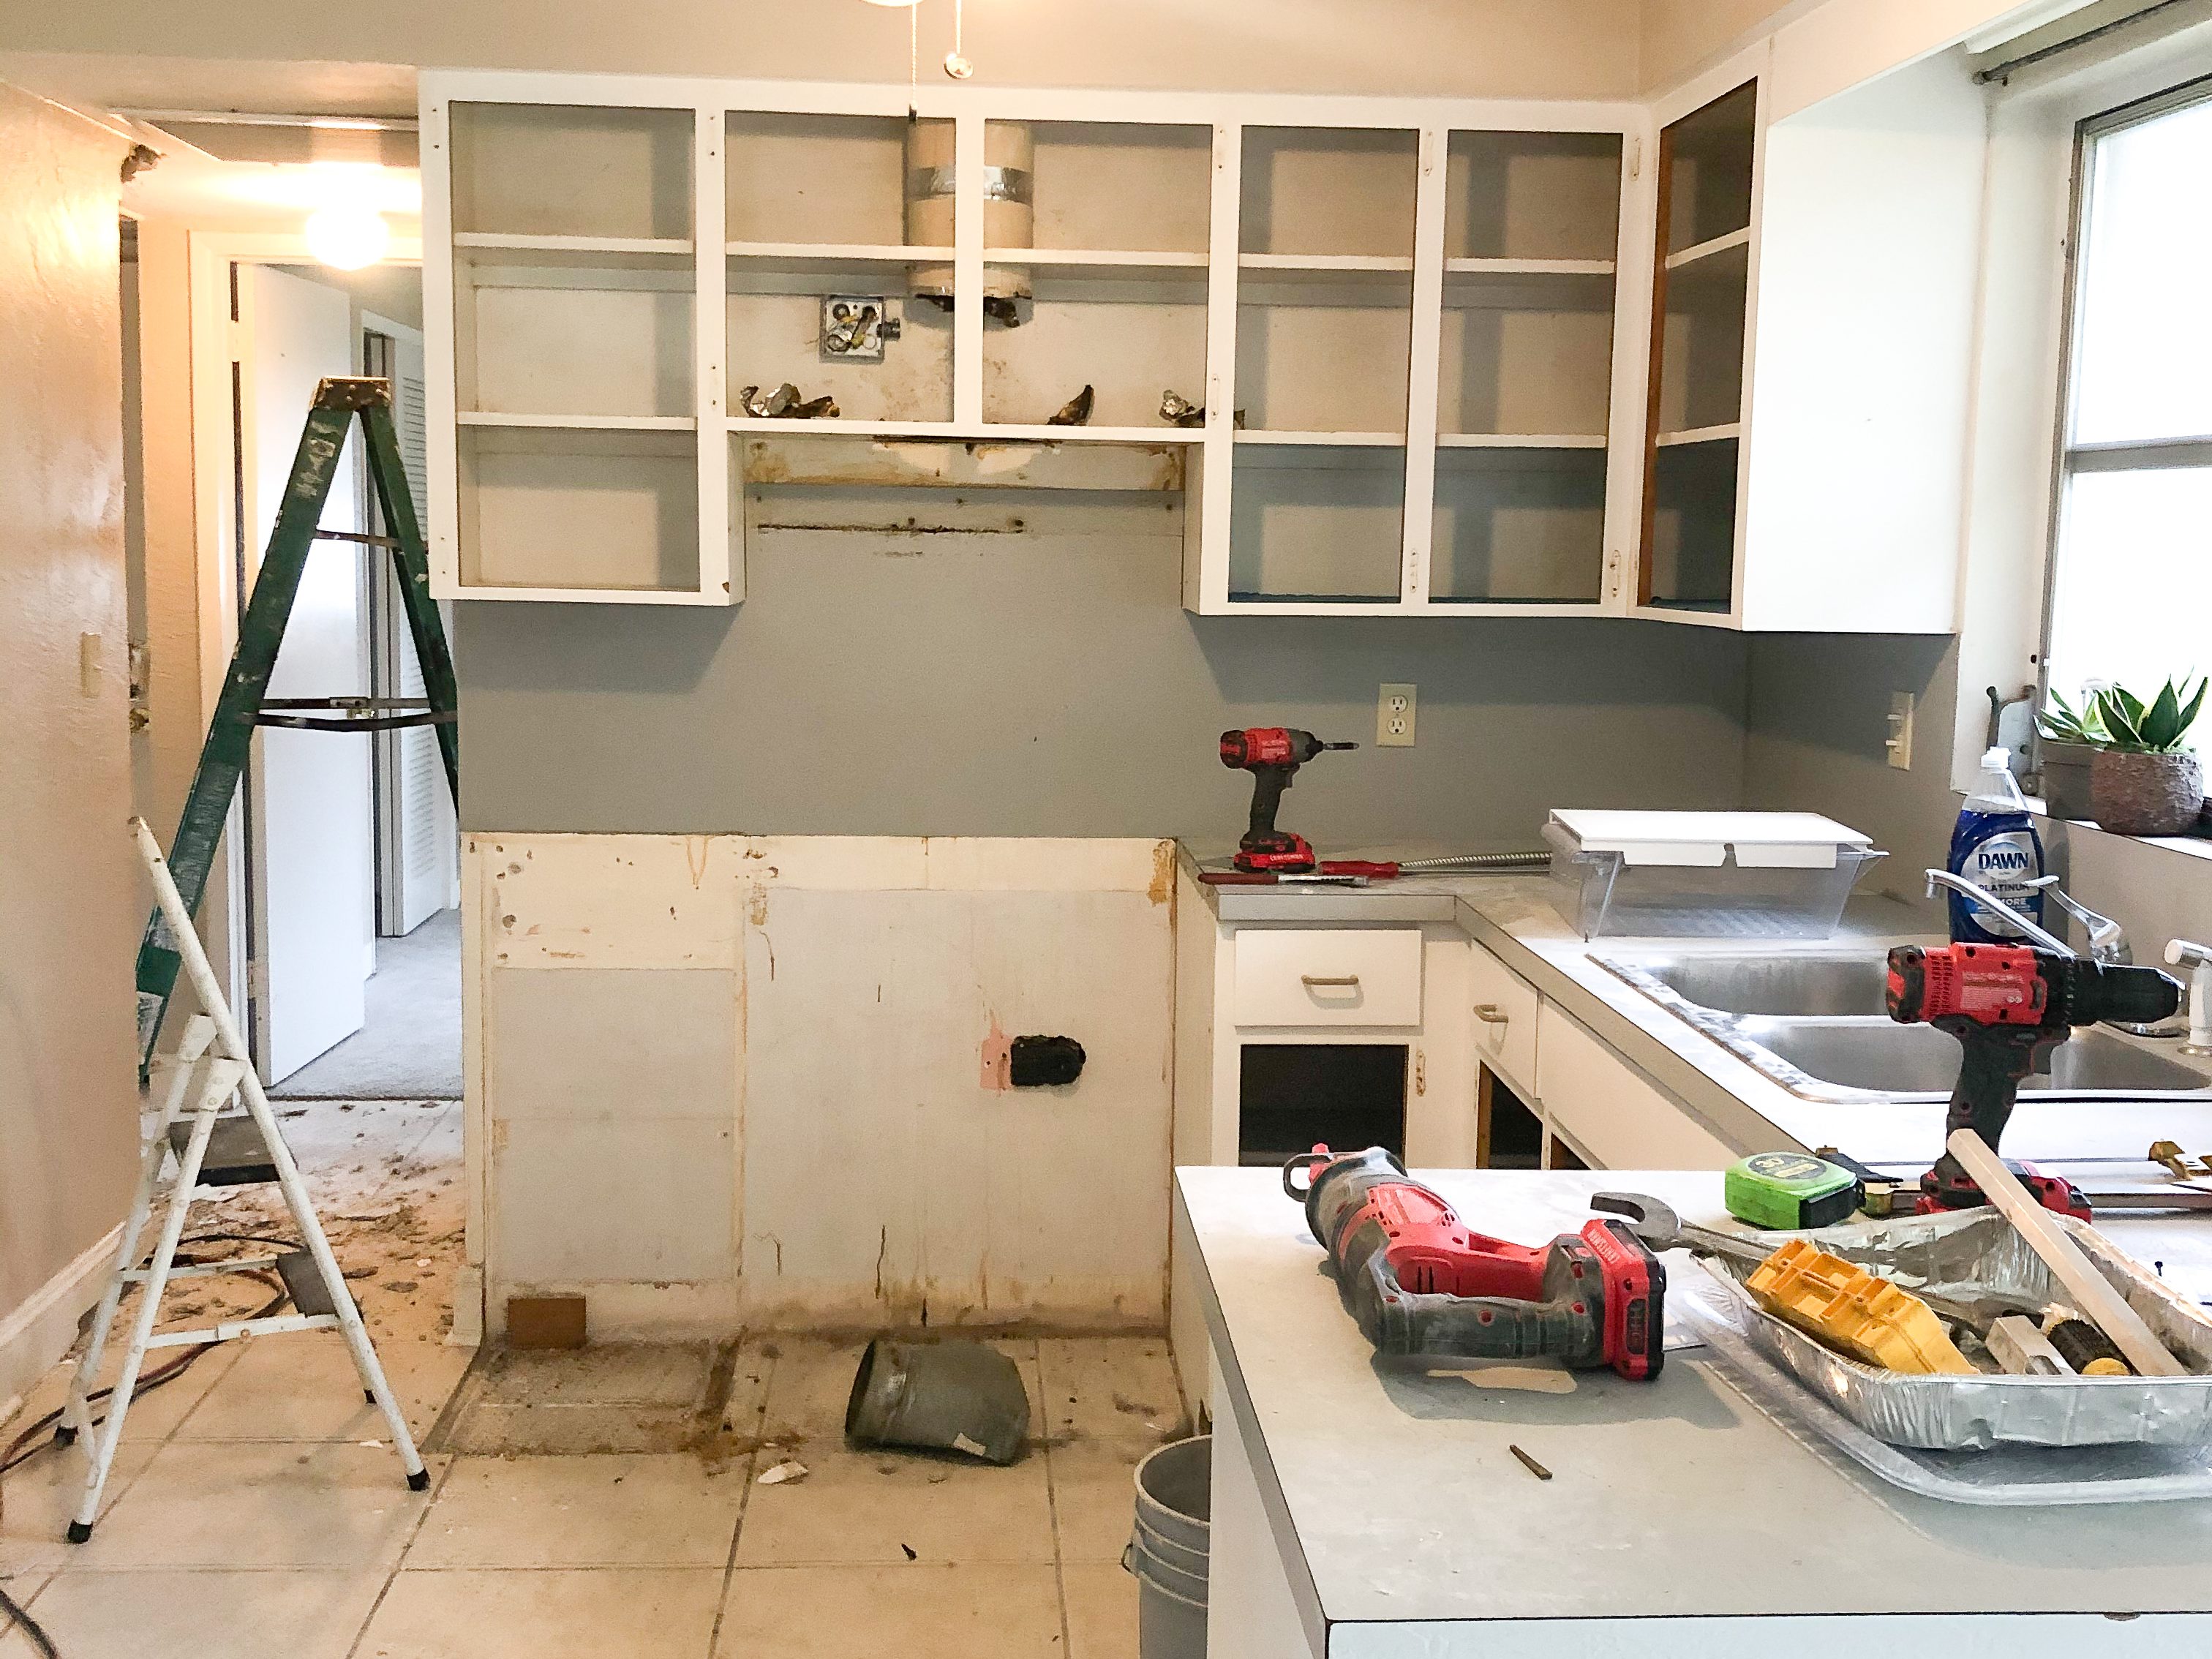
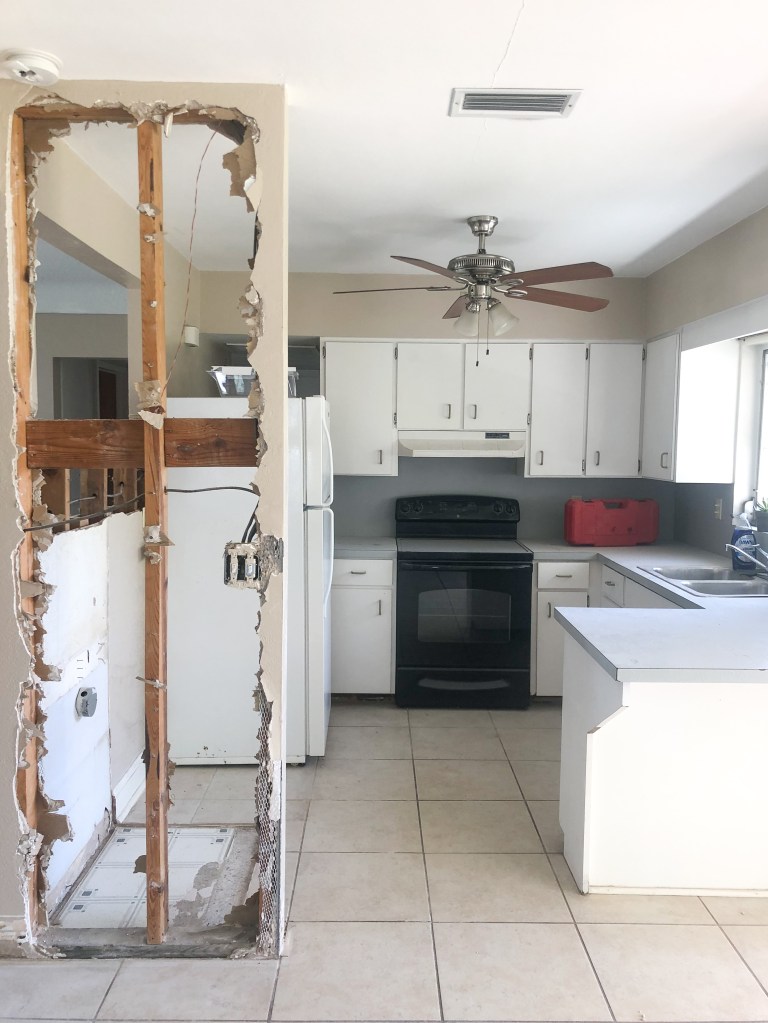
I shared the kitchen plans on THIS POST and it’s the one room I knew I needed to work on first. Since I know I will be spending a lot of time here, I wanted to get it in a position where there was enough counter space and storage. To start, we tore down the old cabinets and knocked out the soffits. Who needs a rage room when you can take a hammer to your own walls! (It felt good at the time, but I was also reeeeaaalllllyyyy hoping we could put everything back together again).


The footprints on the shelf here scared me LOL
A few things surprised me:
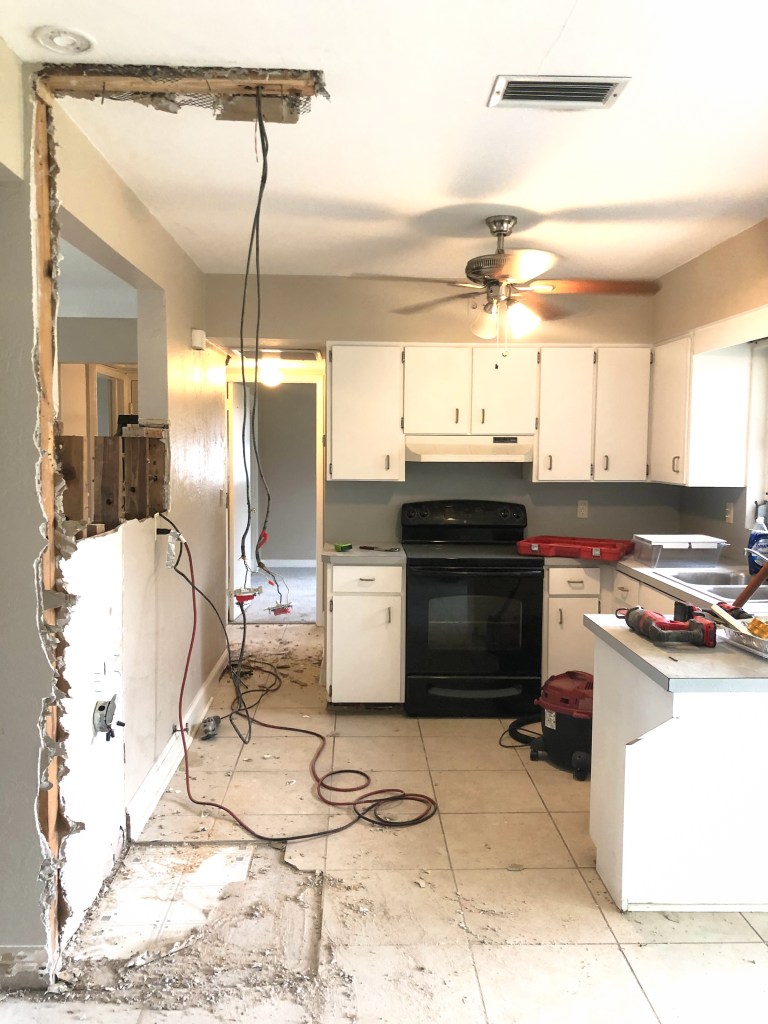
The cabinets were not individual units. I don’t know why I thought they were, just assumed they were like the stock cabinets you can pick up already built at Home Depot. I was wrong. Haha, so wrong. They were custom built into the walls and were basically all one unit held together by 3 inch nails. I was hoping some of them could be salvaged as cabinets to be used in the garage, but unfortunately that was not going to be the case.
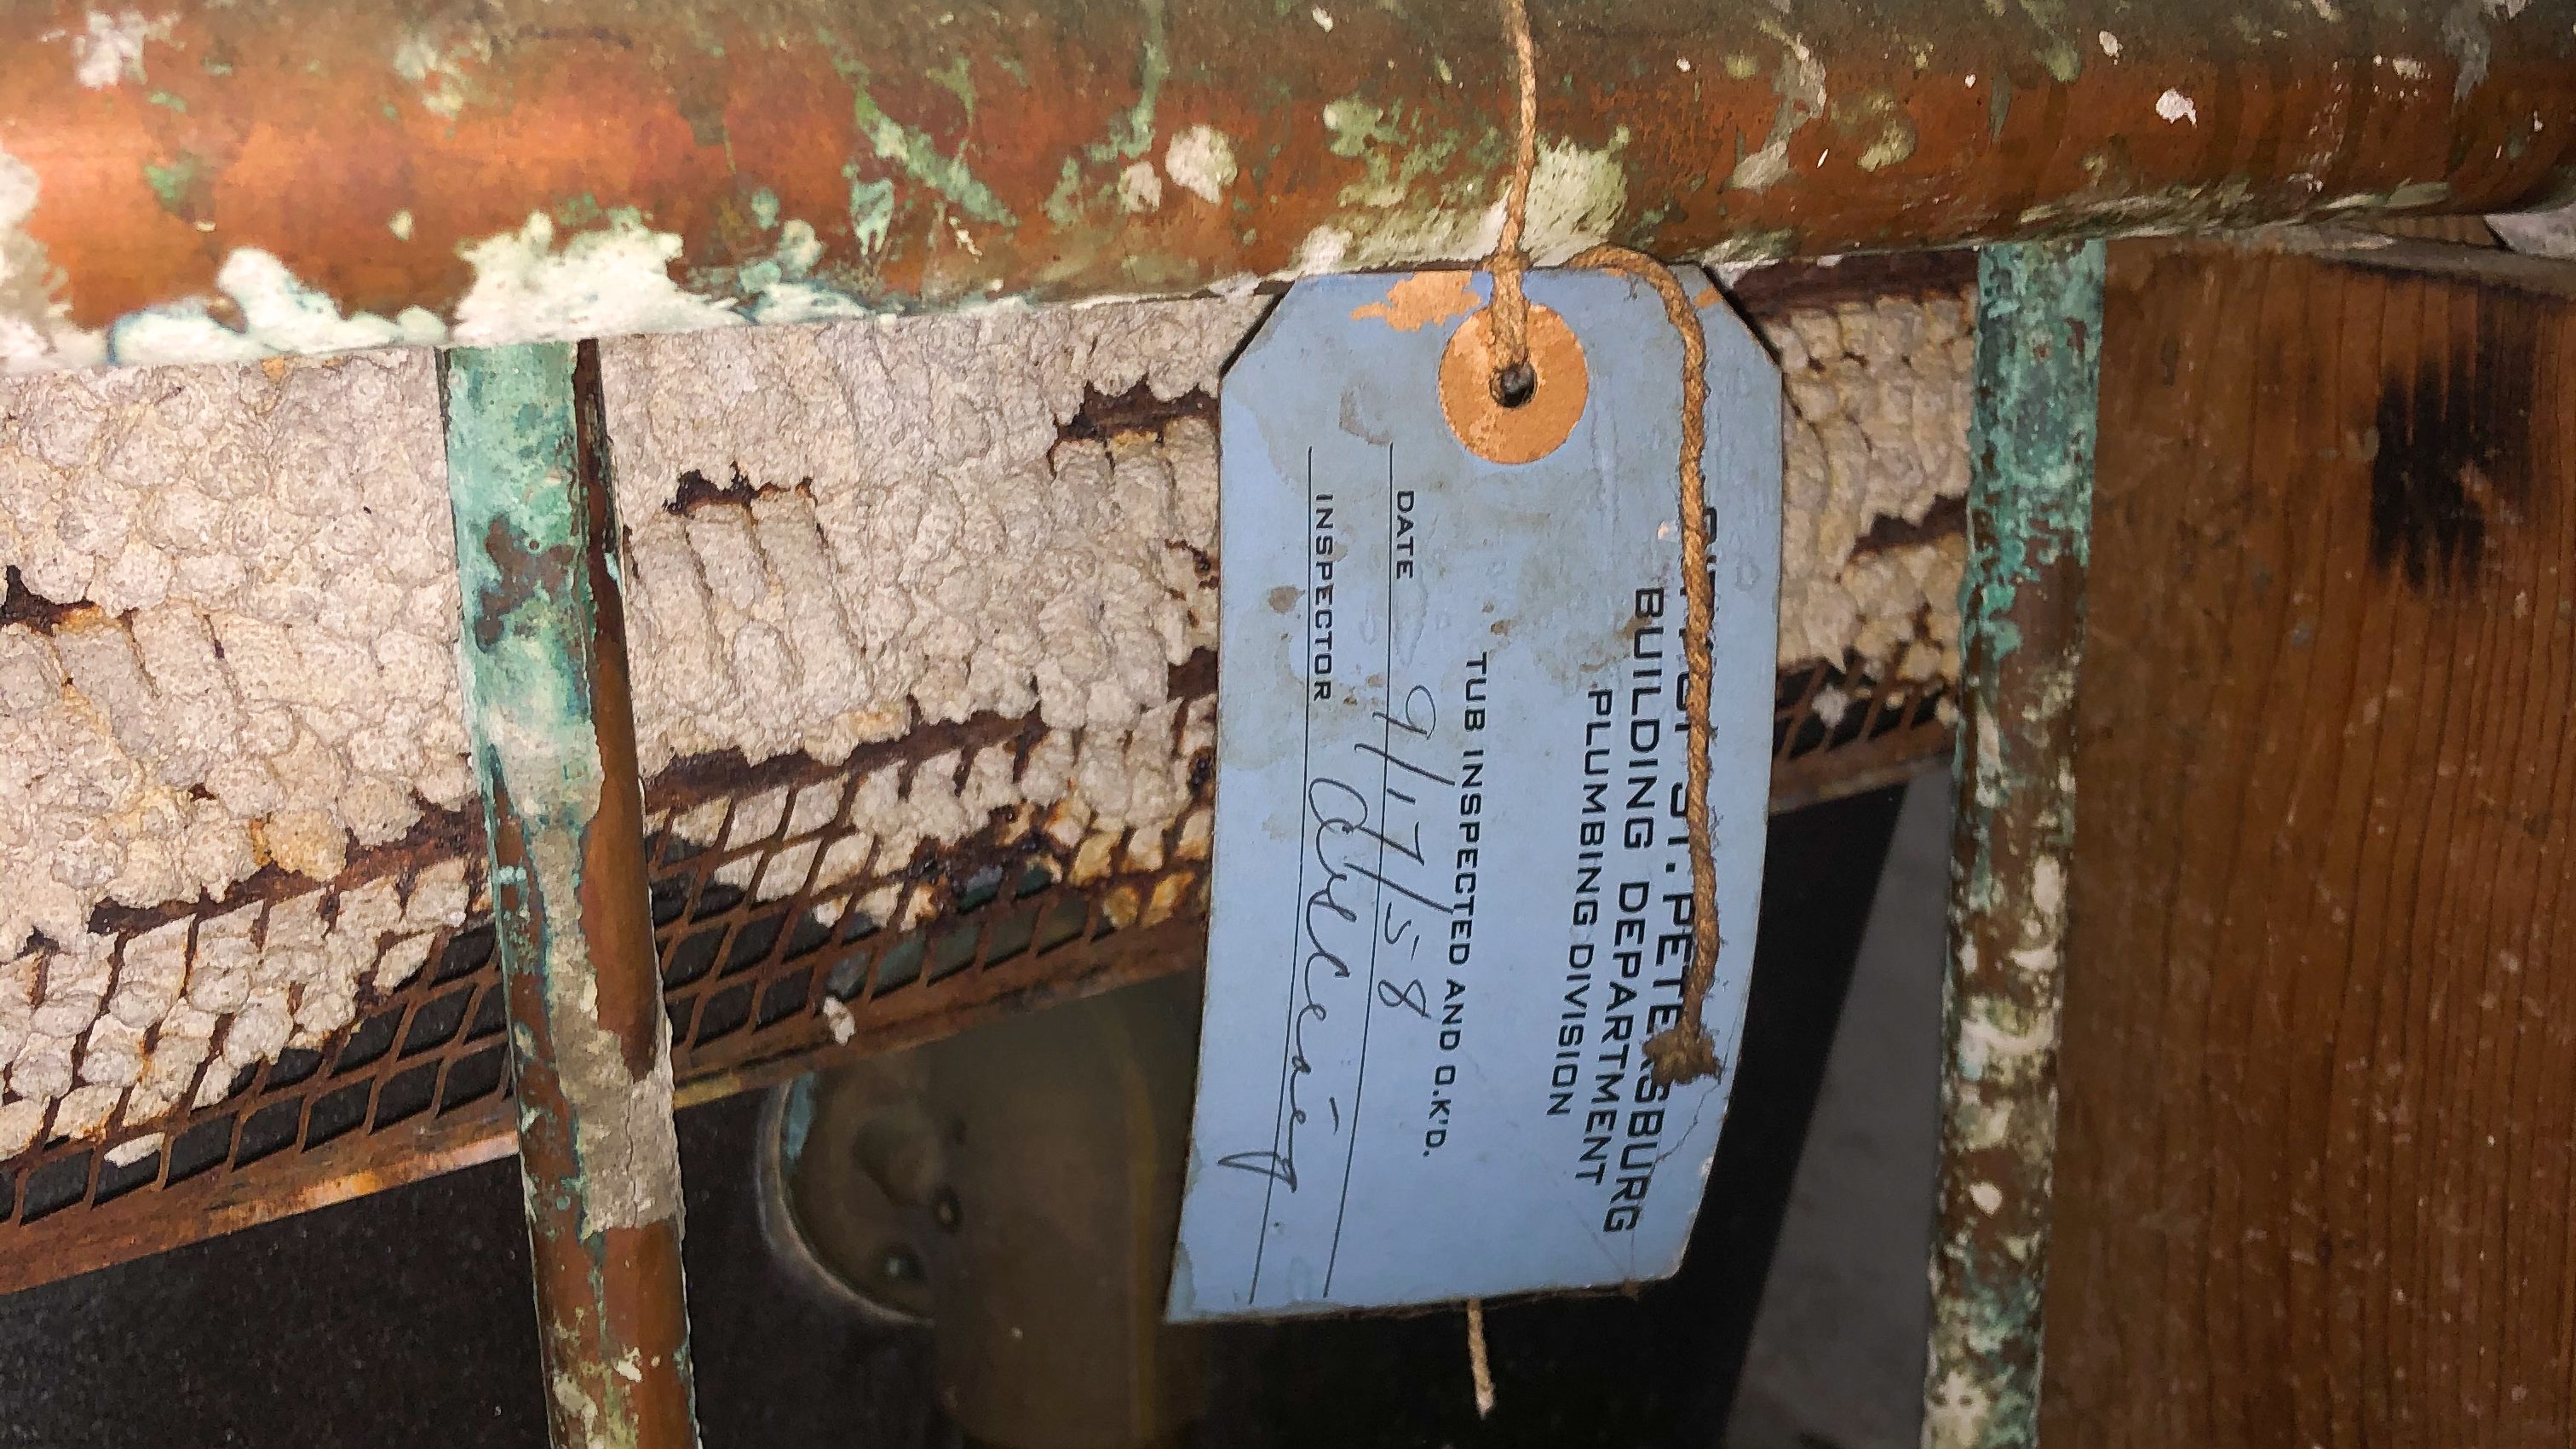
Something pretty cool though was that when we took out the corner cabinet, I found the plumbing access to the shower in the bathroom. In it, was the original plumbing inspection tag from 1958! It’s so cool to find little pieces of history like this. It was just a different time back then, and everyone had such pretty script handwriting and everything was built to not be broken easily. That’s good for quality, but a pain for renovating newbies like us!
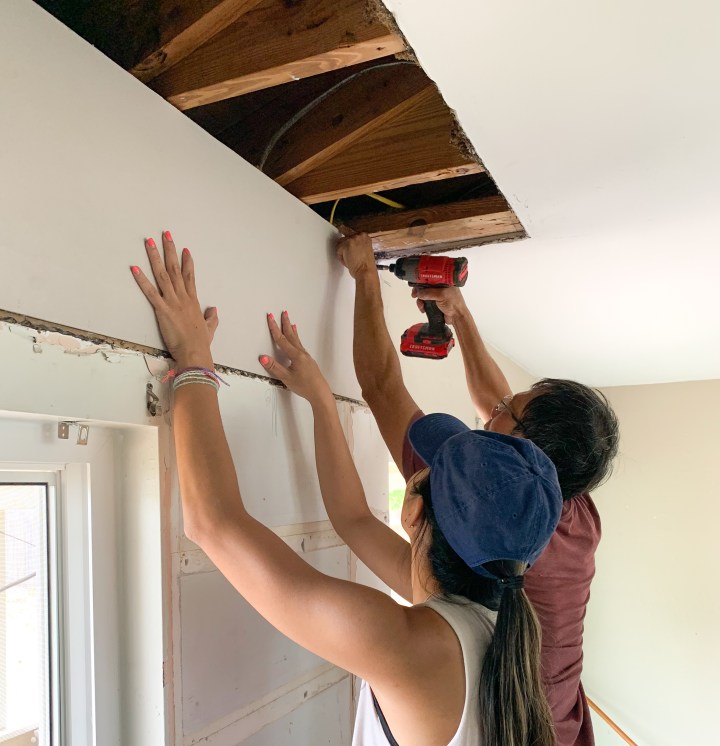
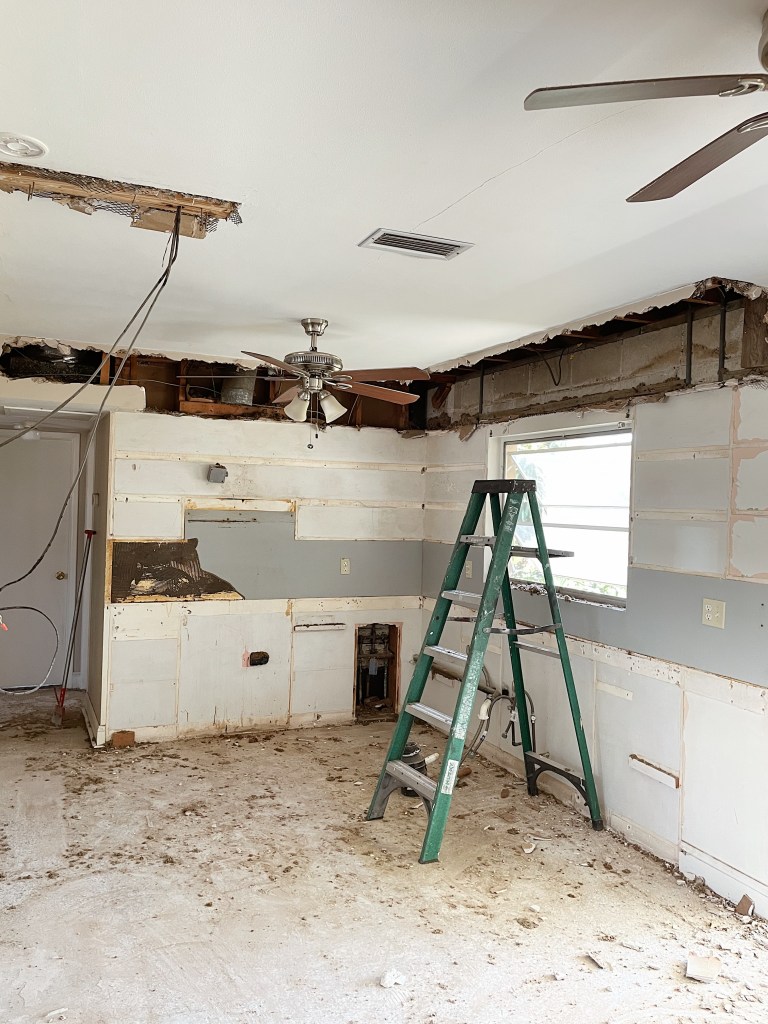
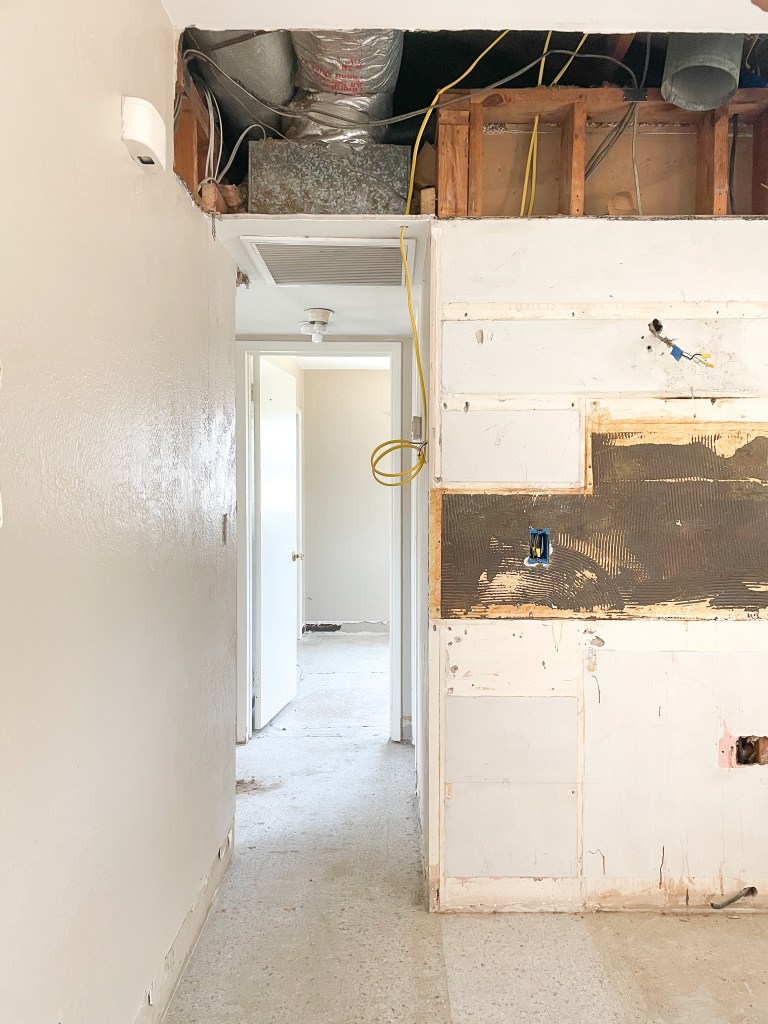
Then I didn’t realize that removing the soffit exposed the full attic. Again, I don’t know what I was expecting, but I thought the ceiling was at least going to be covered when we took it out. Once we knocked it out, we were leaving a huge gaping hole into the attic… that meant the heat could get in. For a while, we were working in 85+ degrees until we were able to close up the walls. Y’all… AC was the motivation to get the work done… so we spent the full 3 days of Memorial Day weekend installing the dry wall. I never thought I could be as happy as I was to see dry wall up. That just marked the moment that the major building parts were over!

t
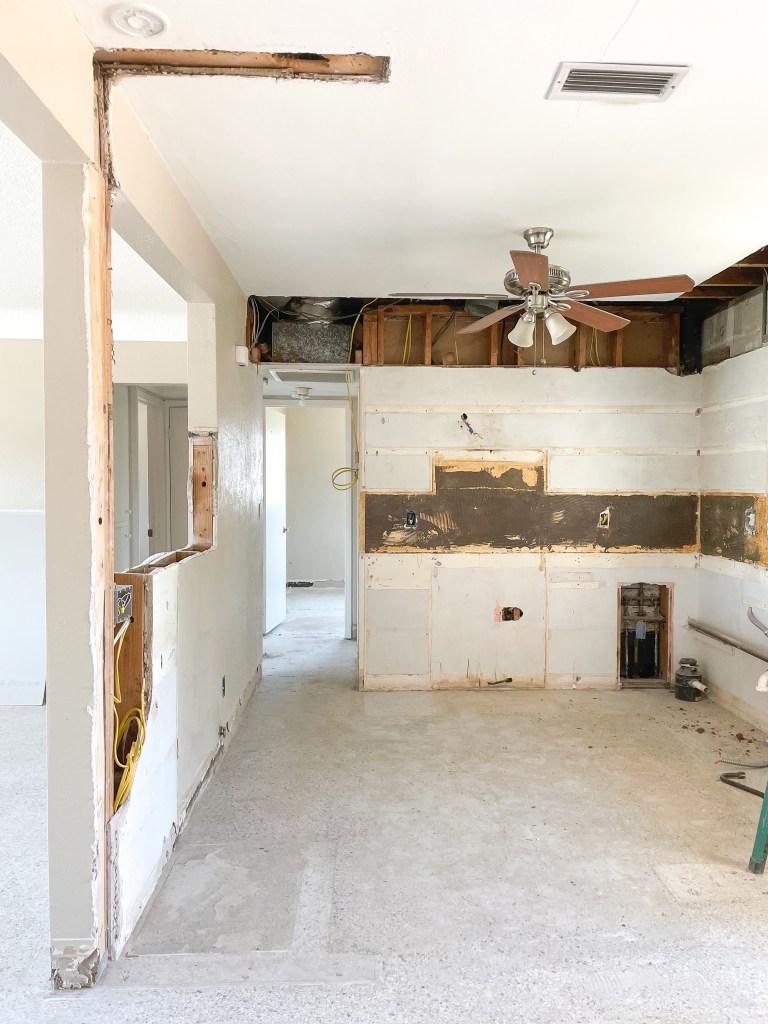
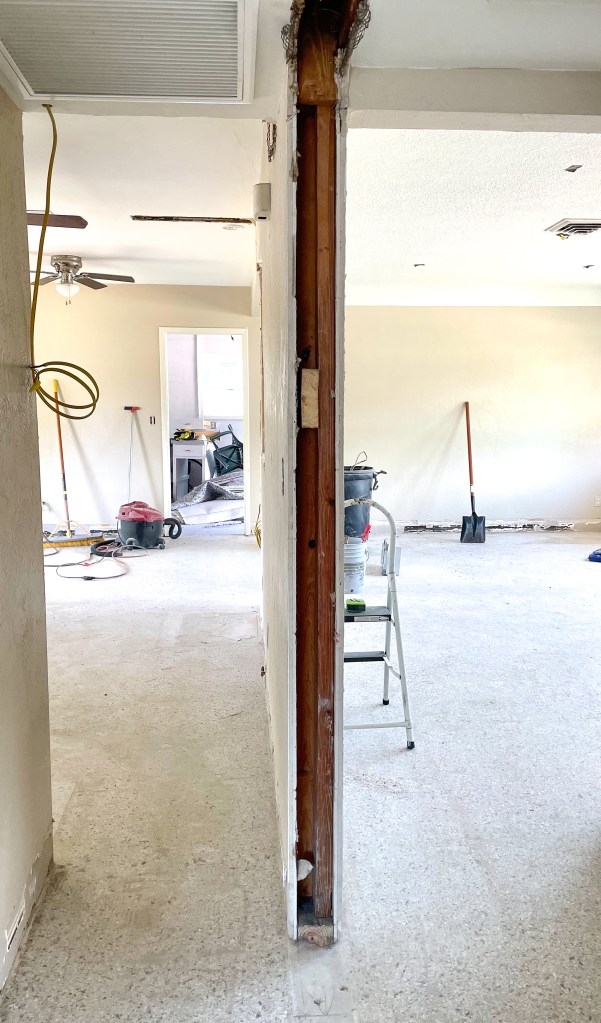
Progression on the walls
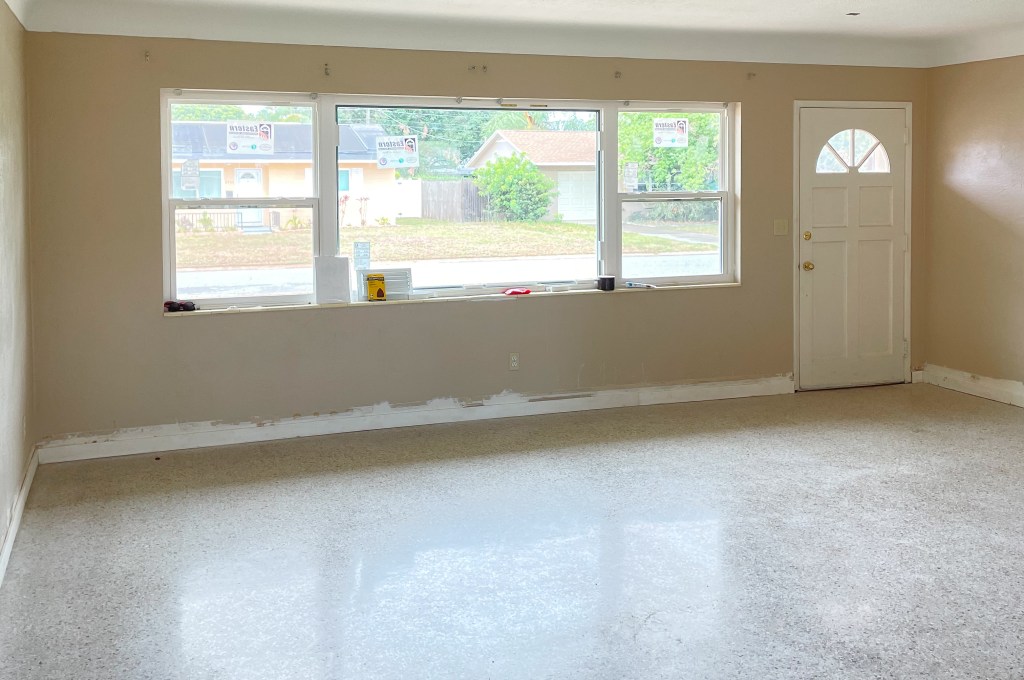
This extra wall here closed up the kitchen and made it feel really small. So I wanted to knock it down to open up the kitchen and bring down the adjacent window wall further to open it to the living room area.
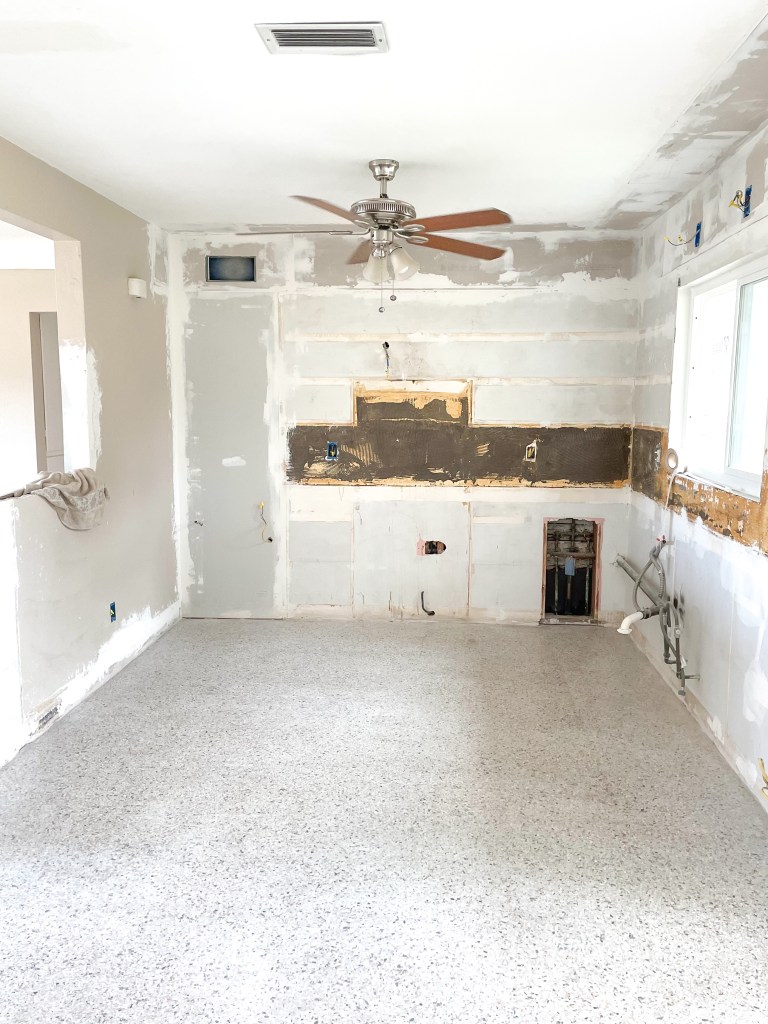
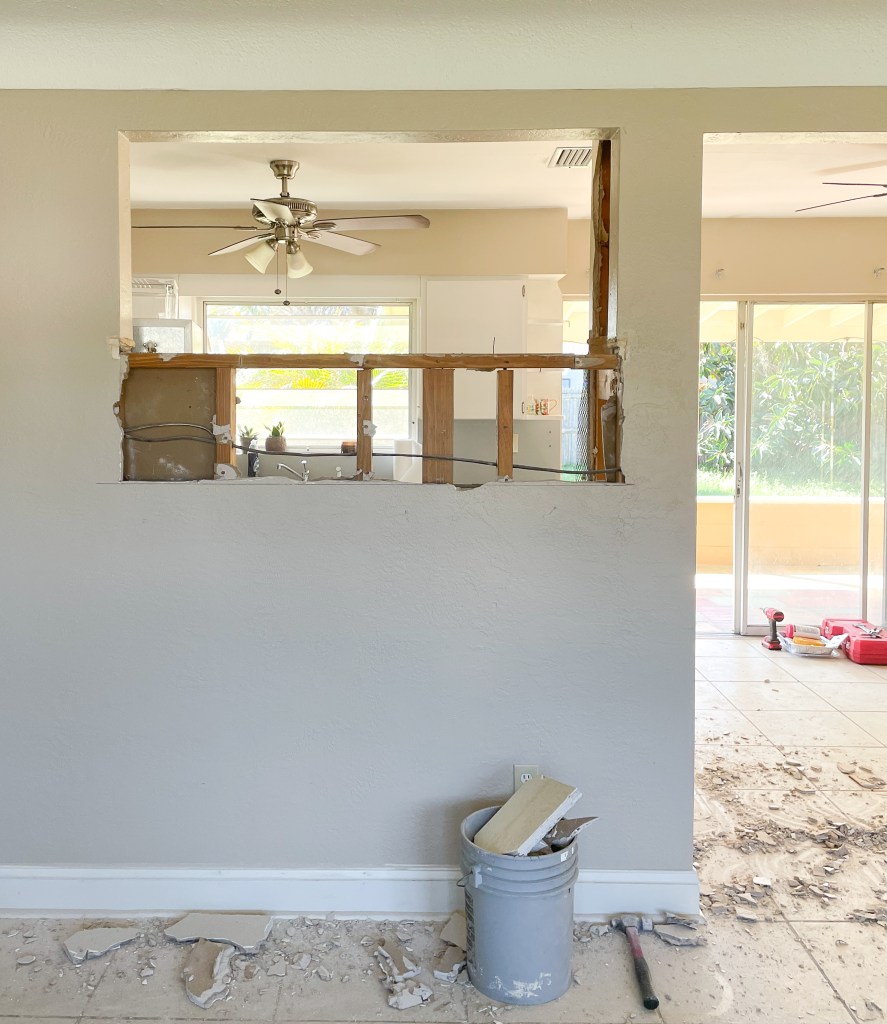

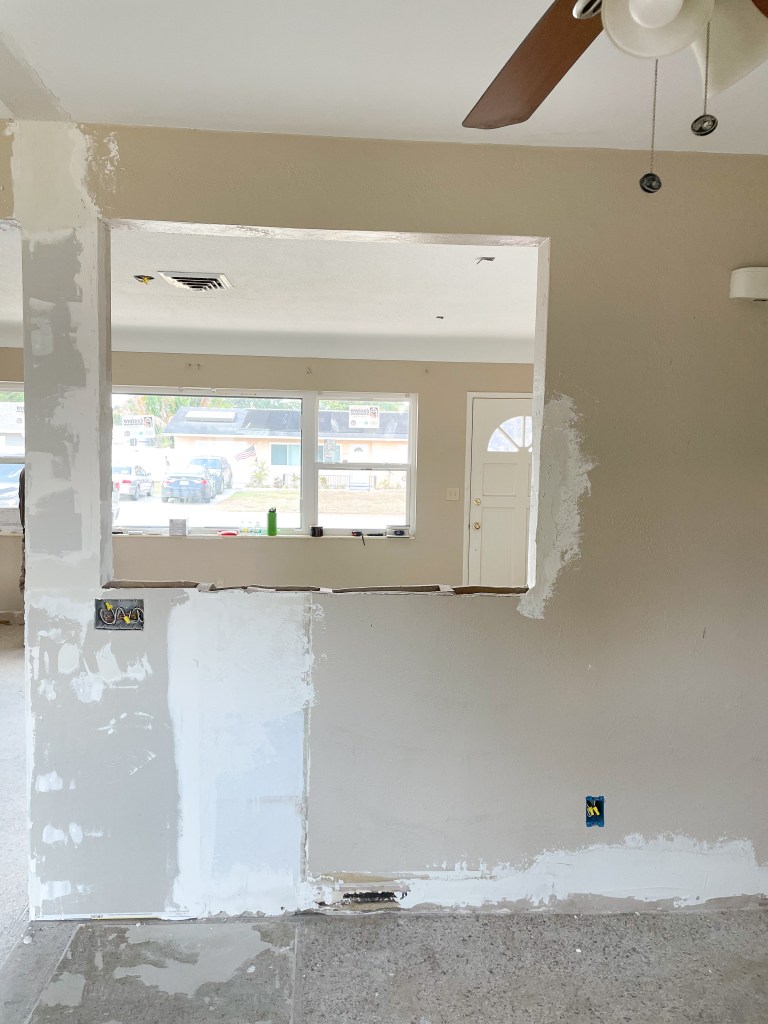
And now we can breathe again, all this spaceee!!
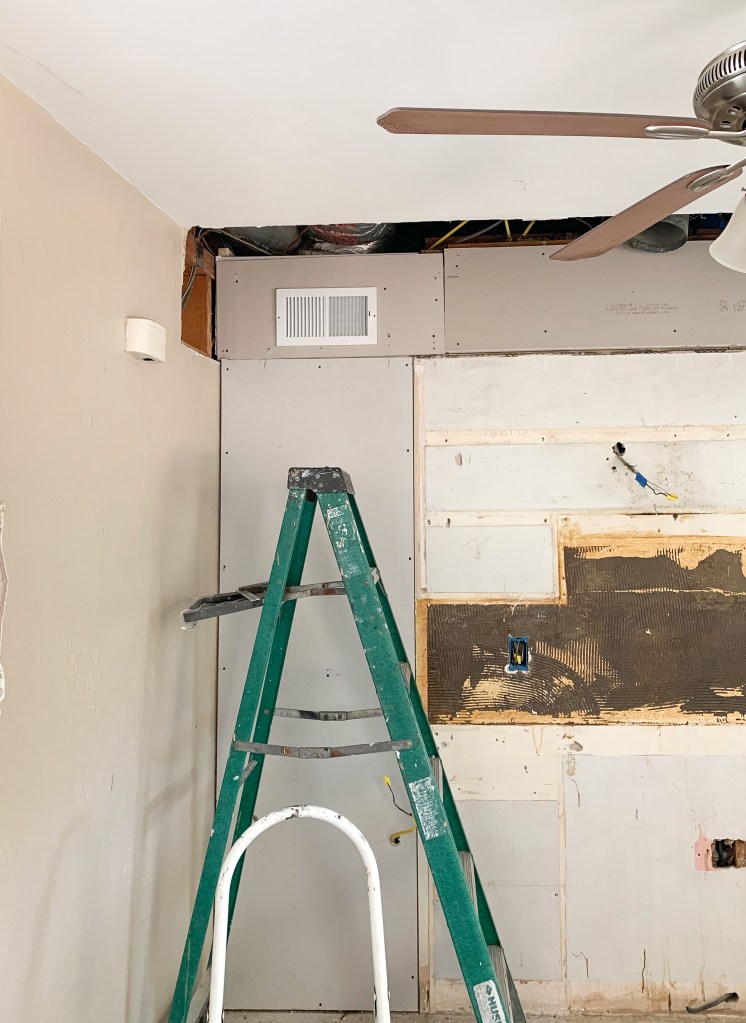
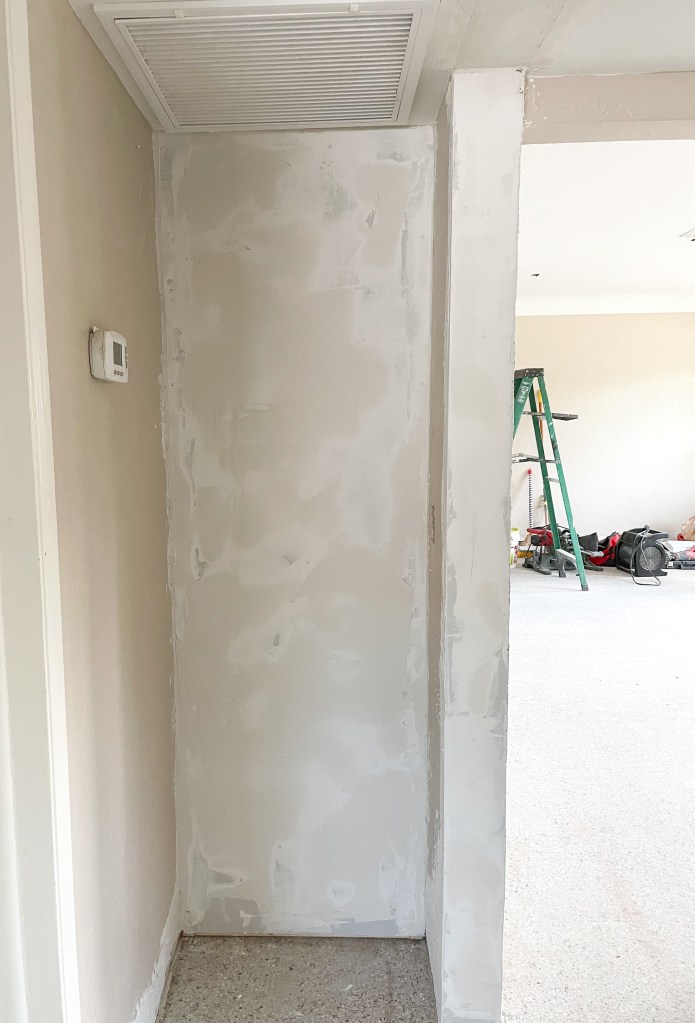
New Hallway Wall
On top of installing dry wall to cover the exposed areas and the ceiling where the soffit was, we also built the wall to cover up the hallway and added a return vent filter. This is where the fridge will go now. On the other side of this wall, I’m thinking this new little nook will be a spot for open storage with floating shelves.
Floors
I had an idea of what I wanted for my floors but I knew 100% that I did NOT want the existing tiles. Anything but those old tiles and dark contrasting grout! I did think about maybe salvaging it by regrouting/painting the grout to a lighter color or tiling over the tiles, but once I removed the kitchen cabinets, it exposed the original floors. So oops, more excuse reason to replacing all of it, right?

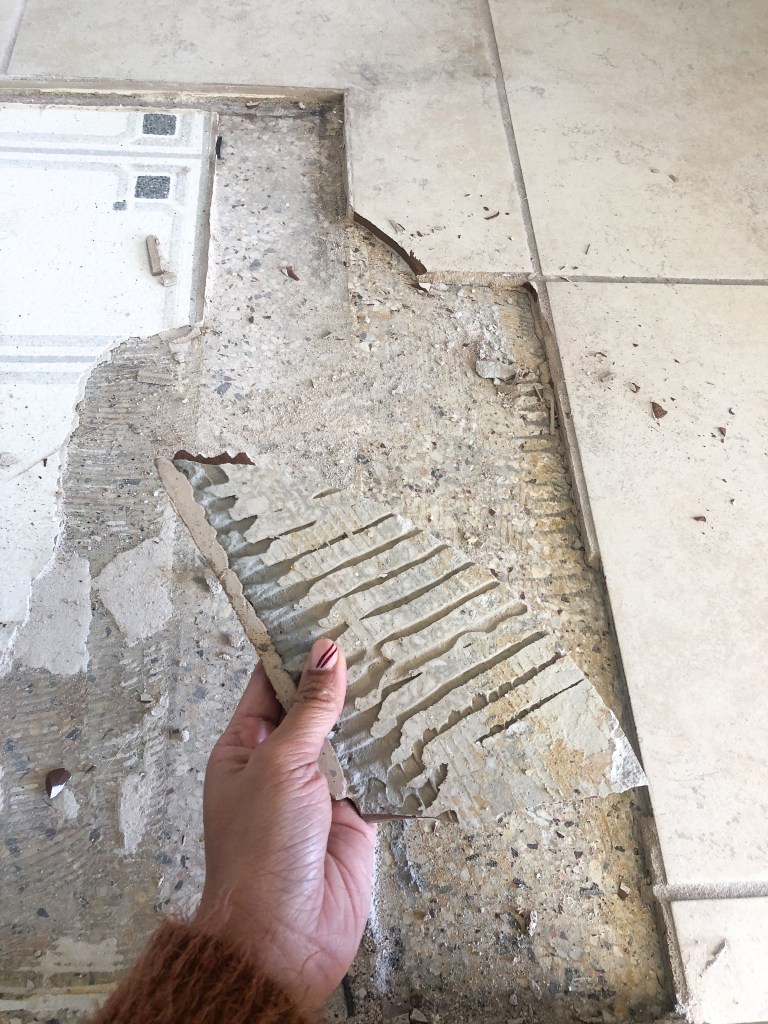
While I don’t have furniture in the house yet, I might as well go ahead and remove the tile. Dad had a scrapper tool, but it was going to be a lot of manual labor to use that to try to peel up the tile. We ended up renting a jack hammer from Home Depot to help us get done faster. We never used the thing before, so it took us a bit of time to figure out the right strategy to make use of the 4 hours we had with it. One person (dad) needed to rip the tile and another person (me) had to clean up the tile around it. It was super loud, dusty and hot. The whole neighborhood must’ve heard it! I’m glad we were able to do it and save money on the labor, but man… I hope I never have to do that again. I might just have to learn to love the tile next time, ha!

At least removing the carpet was easy and a lot more fun, aaaand cue Tiktok:
So let’s talk flooring options now. I was originally trying to decide between a lighter beige or this medium brown wood-like tile from Home Depot. My dad and I were going to take off some time from work to tile the whole house rather than hiring out. Buuuuuuuut…

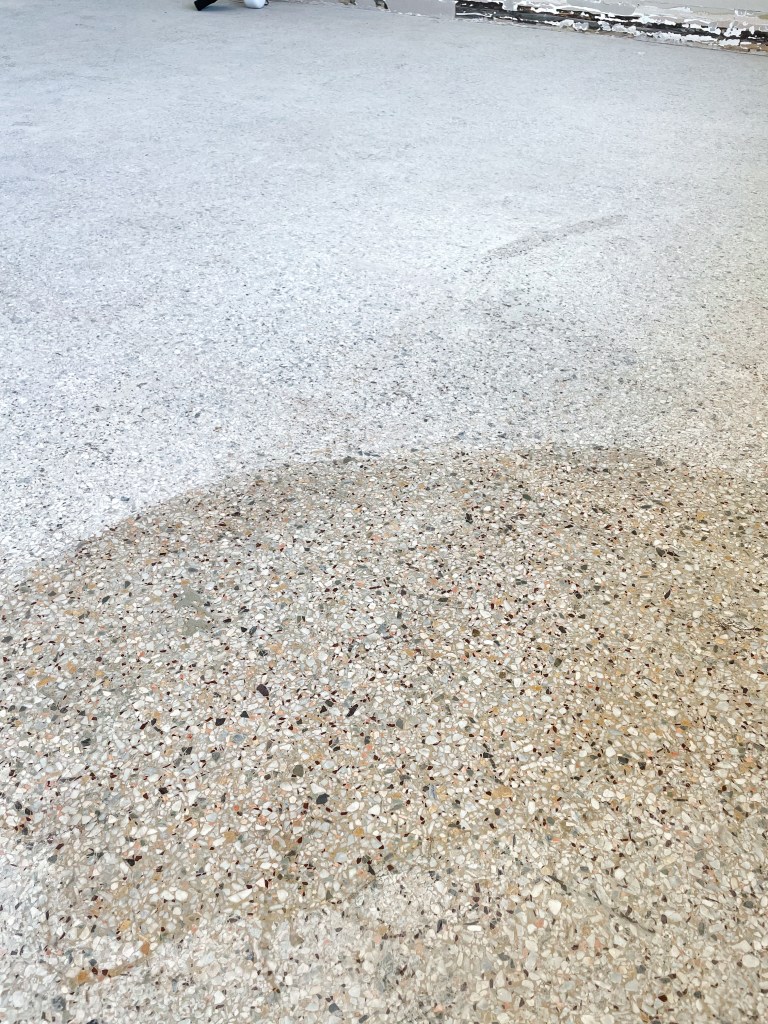
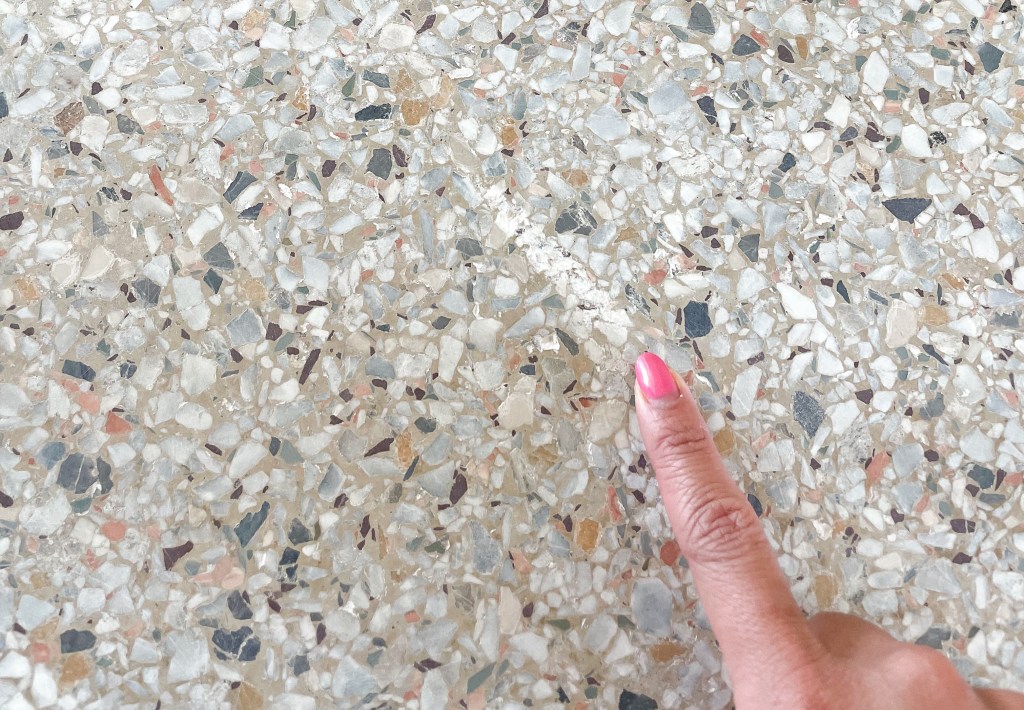
…Then the more I spent time at the house with the terrazzo that was underneath the tile, I really grew to like it. It had some whites and blues in it and I really wanted to be able to appreciate at least SOME of the original features of the house. All it needed was to get rid of the layers of dust and some polishing to remove the thinset and patch up some spots. I called a few local companies that specialized in terrazzo refinishing and learned a lot of about the flooring which got me really excited about keeping it. It’s super durable since it’s pretty much stones and concrete, it’s seamless throughout the house (no grout lines here!) and it’s easy to maintain. I ended up going with Gulf Coast Floor Maintenance, and Mike was awesome. His team did a great job repairing some spots where there used to be carpet tacks and where the jackhammer went a little too deep when we were still trying to get the hang of using it. OOPS! BUT there wasn’t that much surprisingly, so that goes to show you how durable the floor was that it SURVIVED a whole jack hammer going through it. It took 3 days and the floor was done! I asked for a satin, almost matte polish instead of the super shine that terrazzo floors usually get.

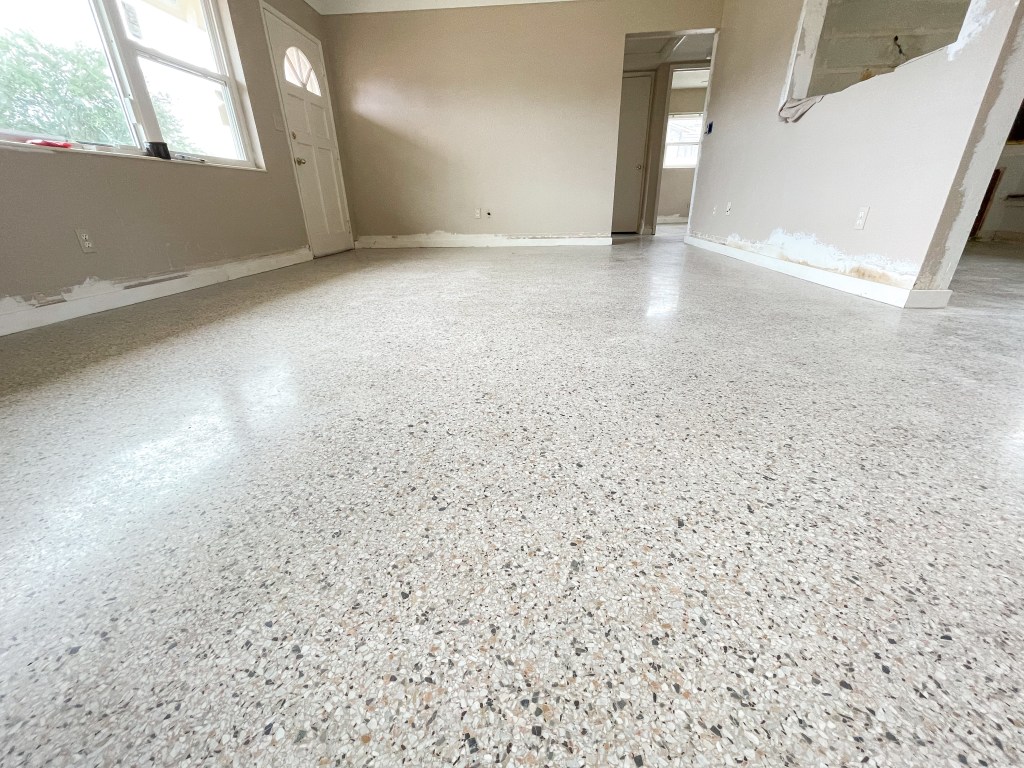
So now with the floors done and the walls are built, we just spent the last THREE weekends painting. I didn’t realize how much I don’t like painting until I had to do it on back to back to back weekends. The worst part is that I made the the painter’s mistake of leaving the tape on the wall and peeling it off AFTER the paint dried, which took off parts of the paint with it. I CRY!!!! So I had to sand down spots and paint it AGAIN. The bright side in all of this is that I saved $$ doing it myself and got a full body work out in. I went with White Gallery by Sherwin Williams, which comes out to a soft, warm white!
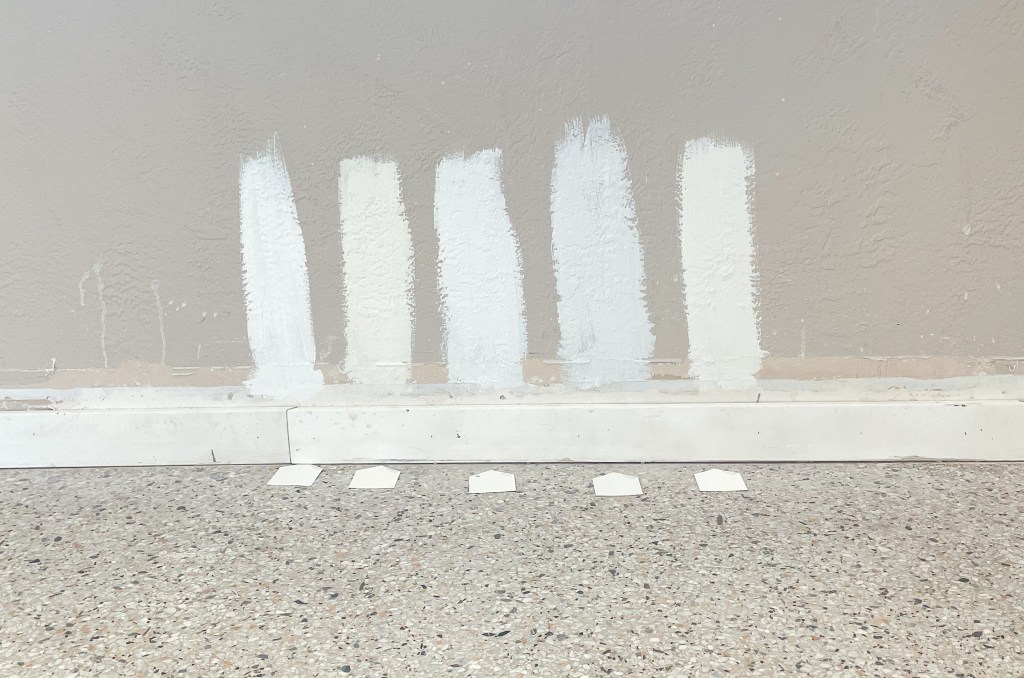
*Pro tip: DO NOT skip out on getting paint samples before painting. The colors on the swatches don’t always look like that and the light you get in the rooms all change how the undertones look. I was 100% dead set on going with the 3rd color called Greek Villa, but in the room, it was much grayer and cooler toned than I thought and I wanted something a bit warmer. I was honestly surprised that White Gallery was the winner!
WHOOOO that was a long one! Pat yourself on the back if you made it this far! Now all we have to do is install the kitchen cabinets and get appliances before moving in. It’s been such a journey filled with sweat, measurements (AKA MATH) and lots of learning and researching. BUT the end is so close and I can’t wait to share the results!
